Flamin' Hot Aerochrome
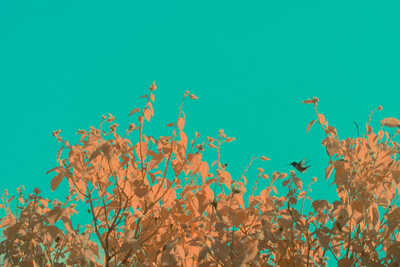
Aerochrome was a Kodak film used to assess the health of vegetation and discern vegetation from things camouflaged like vegetation.
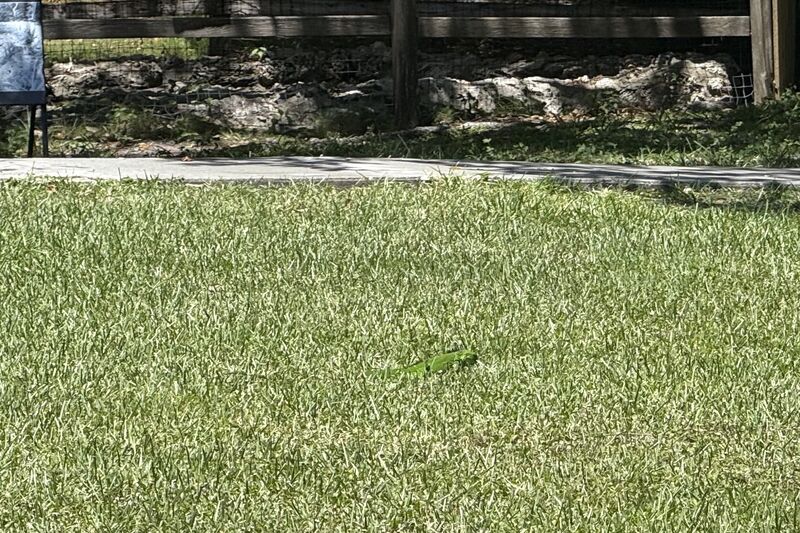
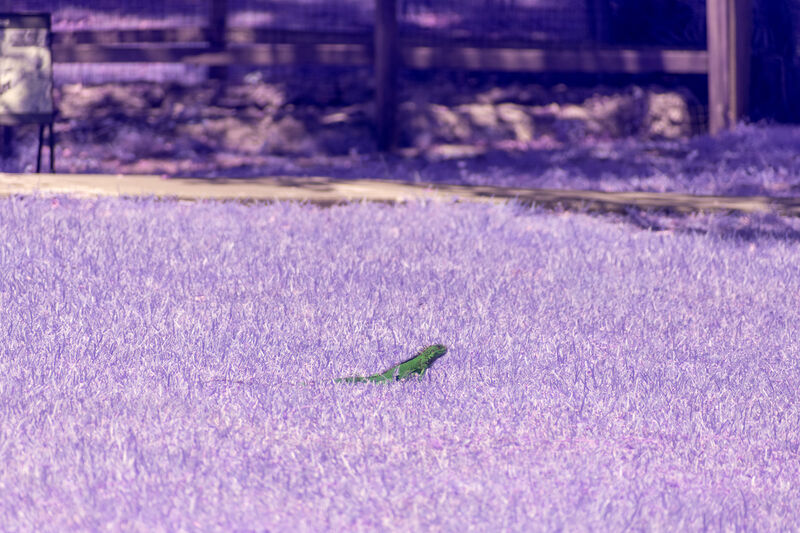
Green iguanas (Iguana iguana) are not in the business of reflecting infrared.
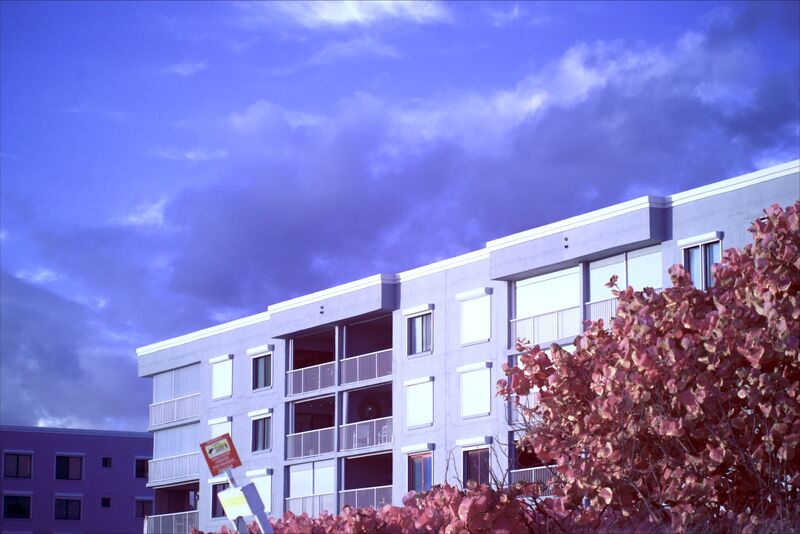
Shot with a yellow filter (that removes blue), red in the scene becomes green, green in the scene becomes blue, and infrared in the scene becomes a vivid red. It’s a cool effect, but since the film got discontinued over fifteen years ago, it’s not ten bucks a shot cool.
Jason “grainydays” Kummerfeldt produces documentaries about photography, primarily film in the western US, and has on many occasions showcased the Aerochrome look. He sometimes opens or closes videos by chugging a can of Flamin’ Hot Cheetos Mountain Dew (I do not want this in my life, please do not bring some to Toorcamp or DEF CON and do not let me have any) as a protest to get Kodak to restart manufacturing of this specialized industrial film that is entirely superseded by digital technology.
About two years ago, he released a video “How I Fake Kodak Aerochrome” that demonstrates his “Flamin’ Hot Aerochrome” technique to recreate the look on film.
It’s a great technique, and I decided I wanted a prose version that was easier to follow along with.
Table of Contents
- Shooting Infrared on Digital
- Jason’s Technique
- My Lightroom & Photoshop Workflow
- Acorn
- GNU Image Manipulation Program
- DaVinci Resolve
- Elixir Nx
- Closing Thoughts
- Thanks
Shooting Infrared on Digital
People can’t see infrared1 people in the proximity of infrared georg who shorted out the resistor on their DEF CON 16 badge to make the infrared LED so strong it could turn HP laptops on while in a bag are outliers and should not be counted . We mostly expect cameras to see what we see, so digital cameras ship with a “hot mirror” that reflects infrared away from the sensor.
If you remove this hot mirror (or pay a professional to remove it) all the channels on the sensor will receive infrared. This is what we’re interested in, but it has caveats.
Different wavelengths of light go through different media (including lenses) differently. This is what makes rainbows and the cover art of “Dark Side of the Moon” that way. Lens designers put in a ton of effort to make lenses that handle the visible spectrum in a sensible way, but often infrared gets sidelined.
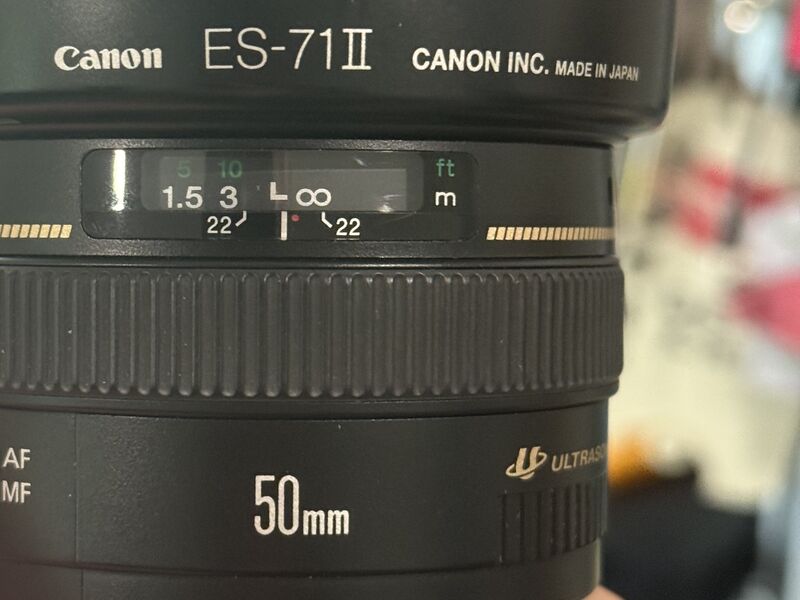
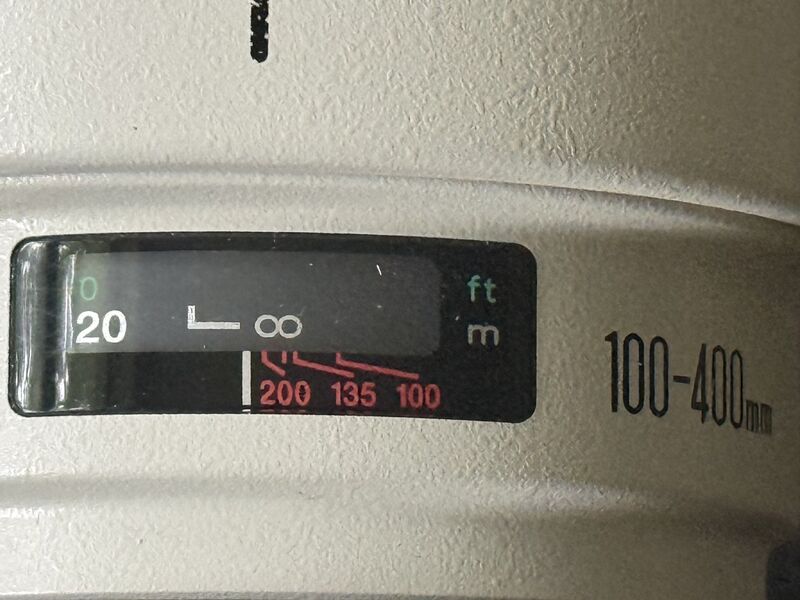
Prime lenses might have one infrared index, while zooms might have different infrared indices for different zoom levels.
Some lenses will have indications for how to focus for infrared. The manual for my Canon EF50mm f/1.4 USM says:
The infrared index corrects the focus setting when using monochrome infrared film. Focus on the subject in MF, then adjust the distance setting by moving the focusing ring to the corresponding infrared index mark.
That’s a lens for Canon EF, a system for Single Lens Reflex (SLR) cameras. SLRs with autofocus generally have autofocus sensors in the viewfinder path, so you can focus while you look through the lens and then have the mirror flip out of the way of the medium (whether it’s film or an electronic sensor) to shoot. If you put an infrared sensitive medium in these cameras, it won’t affect the focus sensor, so it makes sense to require a manual step.
I got a mirrorless body modified2 a Canon EOS R, the first Canon RF camera, and my first full-frame camera. I’ve got a newer RF mount camera as my main, and it’s nice to be able to use the same lenses with both bodies. , which is so much better in this regard. It can mount any EF lens with an adapter, and the focus sensor is the image medium, so no correction for IR is needed.
The technique in this article relies on being able to have infrared coming in on only one channel, and not mixed in to every channel. To achieve this, we use a yellow filter that blocks blue light, and then subtract the blue channel from the red and green channels.
Jason’s Technique
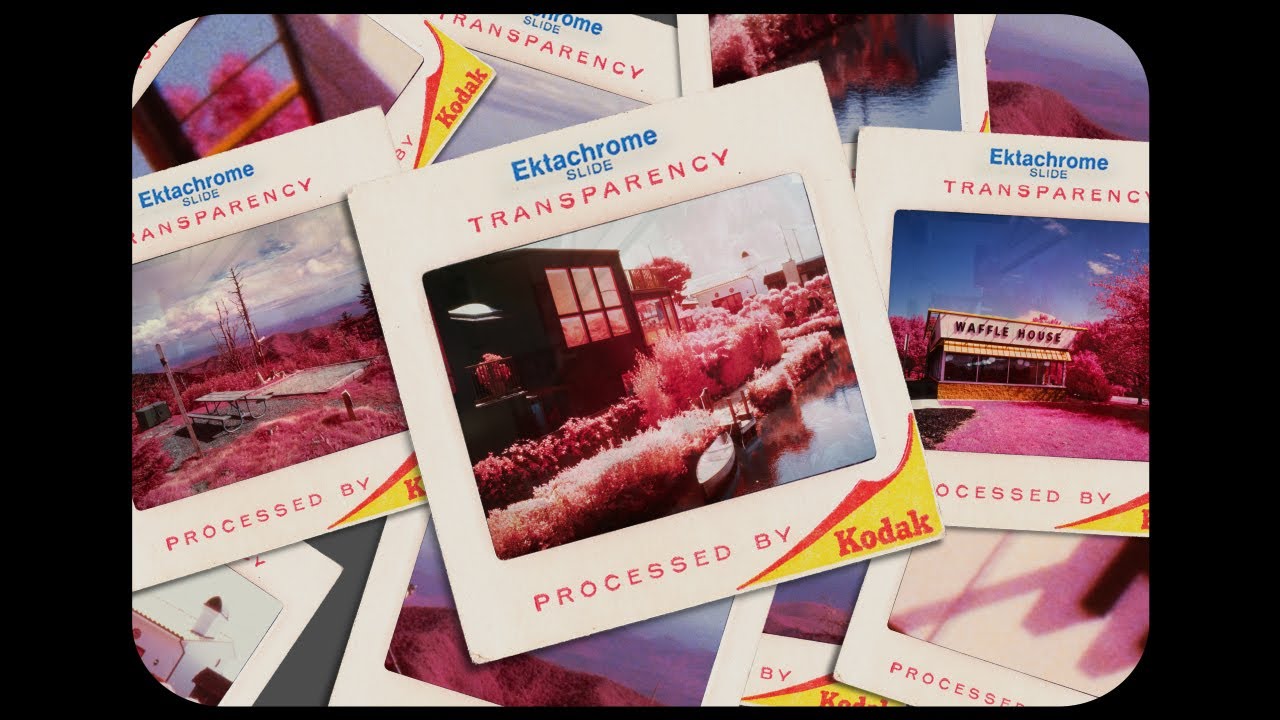 How I Fake Kodak Aerochrome
Dec. 21, 2023
Watch on YouTube
How I Fake Kodak Aerochrome
Dec. 21, 2023
Watch on YouTube
I really recommend watching the video (and all of Jason’s videos tbh), but his technique is:
- Shoot with a yellow filter and UV filter on a
full-spectrum modified digital camera,
producing an image with the channels:
- red = red + IR
- green = green + IR
- blue = IR
- Open the image in Photoshop.
- Duplicate the original image into three new layers, labeled “red”, “green”, and “blue”.
- Attach a channel mixer adjustment layer to the red base image that routes 100% of the red channel of that layer to the red, green, and blue channels.
- Group the red base and its channel mixer into a layer group.
- Repeat the channel mixer and group stages for the green and blue bases. You should now have “red,” “green,” and “blue” groups that each make a black and white image out of one of the channels of the base image.
- Grab the blue layer group, duplicate it, and merge it into a new layer labeled “infrared”.
- Move the “infrared” layer above the channel mixer in the “red” group. Change the blend mode to “subtract” and set the opacity to “around 50%, for starters.”
- Add a “curves” adjustment layer above the infrared layer, and pull the center of that down a bit.
- Duplicate the “infrared” layer and put it on top in the “green” group.
- Set the green group’s infrared layer to subtract 80% instead of 50%.
- Put a curves adjustment layer below the green group’s infrared layer, and boost its center (“gamma”) “just a little bit.”
- Back in the “blue” group, add a curves adjustment layer to the top, and “heave” the center of that down just a bit.
- Add a channel mixer to the top of the “red” group and zero out its red and blue outputs, only outputting green.
- Add a channel mixer to the top of the “green” group and zero out its red and green outputs, only outputting blue.
- Add a channel mixer to the top of the “blue” group and zero out its green and blue outputs, only outputting red.
- Set the top two groups’ blend modes to “screen”.
- Add a curves adjustment layer above all three groups, and fix the exposure of the image with it.
- Finally, go in and make tweaks to the various adjustment layers and blend opacities to fit your artistic goals.
Once he’s happy with the image, Jason then points a film SLR at it, photographs it on to slide film, and has it printed.
My Lightroom & Photoshop Workflow
I use Lightroom (the cloud one, not classic) for most of my non-phone photography. It syncs well between phone, tablet, laptop, and desktop. For more storage space I just throw money at Adobe instead of figuring out how to juggle additional disks between the computers I want to use.
This workflow only works on computers though, because it needs the channel mixer layer, which as far as I can tell hasn’t made it to Photoshop on my phone.
- Import into Lightroom.
- Remove any dust, trash, Yezhovs, bugs, etc. using the removal tools.
- Open the image in Photoshop. On Mac it’s ⌘⇧E, or you can right-click the thumbnail in the tray.
- Add a channel mixer above the
background layer,
set:
- red output = red 0%, green 0%, blue +100%
- green output = red +100%, green 0%, blue -50%
- blue output = red 0%, green +100%, blue -80%
- Between the channel mixer and background layer, add a curves layer. I typically pull the blue down a bit, and mess with red and green’s centerpoints until I’m either mostly happy with the result or decide I hate it.
- Save it, close it, watch it get imported into Lightroom as a new image.
- Make any geometry or other changes in Lightroom.
The channel mixer part I have a macro of, but I should probably just cut a macro of the entirety of Jason’s process.
On the other hand,
since mine is just adjustment layers,
it’s expressible as a look-up table
(“LUT” file, .cube is a common file extension).
Lightroom and a Flamin’ Hot Look-Up Table
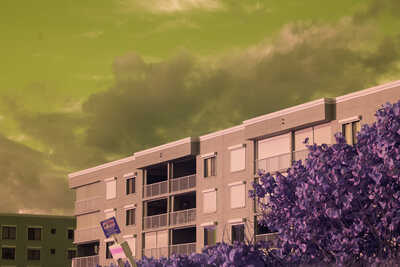
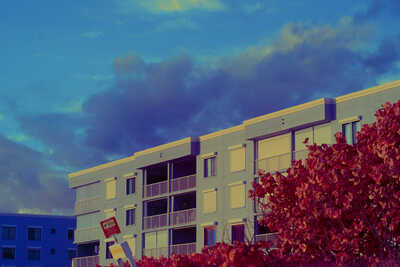
I started with this picture from the beach at sunrise,
twisted3 I often use “twisted” or “spun” or other rotational
terms when talking about this process.
Hue is a circle and often expressed as a number
0º ≤ H < 360º,
wrapping around
from just barely purpley-red at 359.9º
to red at 0º.
The channel mixer setting to send
blue to red, red to green, and green to blue
is basically the same as adding 120º to the hue
of every pixel all at once.
it in Photoshop,
and made a few tweaks to get it to look good.
Before bringing it back into Lightroom,
I hit “save as copy”
(so I could keep the PSD hanging around),
and exported the grouped
channel mixer and curves adjustment layers as a LUT.
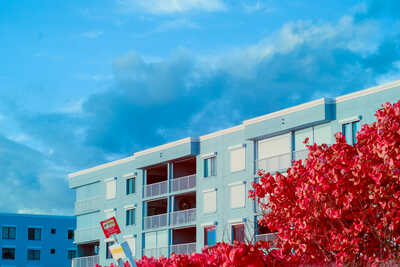
Once I was done in Photoshop, I duplicated the original image in Lightroom so I could have three different versions:
- original without any IR specific stuff
- Flamin’ Hot process done in PS, tweaks and tune-ups in LR
- LUT applied as a “Profile” in LR
Sadly, I found that the LUT via Profile happens last in LR, which means the tweaks after applying the channel mixing can’t be made. These edits aren’t commutative, and LR simply4 “simply” here basically means “correctly for most workflows.” There’s a processing order that makes sense artistically and works numerically for most photos, and making it the only thing that LR provides is good for the majority of users that just want to develop a photo normal style. “Edit in Photoshop” is a good escape hatch for the weird stuff. won’t let you do things out of order.
Acorn
I’ve played around with this in Acorn. Acorn is great, if you’re on Mac you should just have this, it launches real fast and does like 90% of what I want to do with images.
It works! It uses Apple’s built-in raw image loading, You can import a LUT as an effect layer, and resequence it with other layers. Last time I emailed the developers, there wasn’t a channel mixer.
GNU Image Manipulation Program
This refused to open a camera raw, which is kinda understandable. Giving it a tiff I exported from Acorn, it was pretty easy to remix the channels, and it keeps the mixer and curves as layers instead of just baking the pixels.
That said, the UI on Mac is somehow more frustrating than both Photoshop and Lightroom, and isn’t even in the same reality as Acorn’s. It doesn’t feel fast or reactive at all, updating previews in tiles from the top-left instead of doing a low-resolution proxy while it figures out the whole image.
DaVinci Resolve
My friend Josef noticed that Blackmagic Design’s DaVinci Resolve was adding photo processing in the public beta for release 21.
It looks like you can do Flamin’ Hot Aerochrome without a lot of effort in Resolve 21! Once I imported the photo and added it to an editing tray, I clicked into the “Fusion” page, added a “Color Matrix” node, programmed it with a really simple mapping of input to output channels, and then tweaked them to my satisfaction5 that is, my satisfaction while wearing sunglasses and sitting under a blue canopy in the backyard, poor li’l laptop cranked to max brightness .
Yes, I’m starting with the same image as above
Plenty Hues in the Resolve Color Matrix
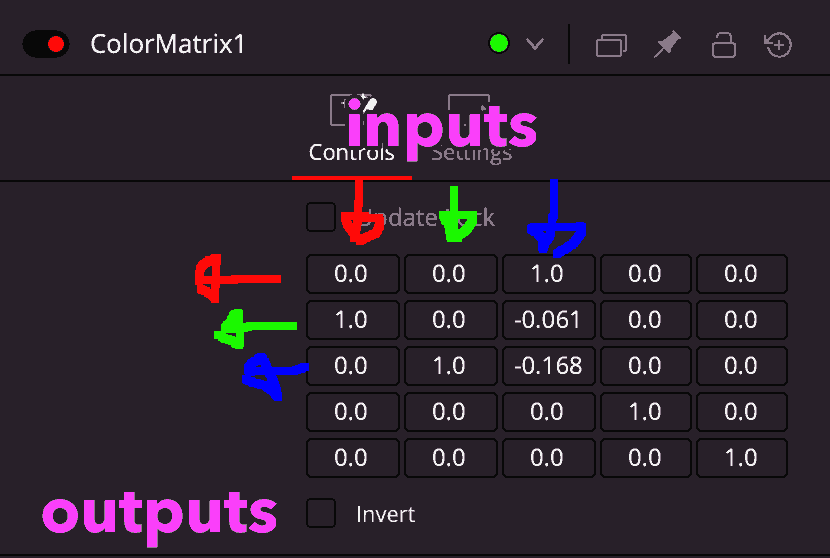
Resolve has five channels in the matrix: our good friends Red, Green, and Blue; plus Alpha (basically transparency), and “Add” for adding. Since I’m focusing on photography, I don’t care about Alpha, and since I’m very very new to Resolve I don’t care about Add today either.
The way I think about this is the input colors are coming in from the top; columns for input Red, Green, and Blue. Outputs are rows, in the same order, so that the identity matrix (basically a “1” in a diagonal line) maps 100% of Red to Red, 100% of Green to Green, and 100% of Blue to Blue.
| Red in | Green in | Blue in | Alpha in | Add in | |
|---|---|---|---|---|---|
| Red out | 1 | 0 | 0 | 0 | 0 |
| Green out | 0 | 1 | 0 | 0 | 0 |
| Blue out | 0 | 0 | 1 | 0 | 0 |
| Alpha out | 0 | 0 | 0 | 1 | 0 |
| Add out | 0 | 0 | 0 | 0 | 1 |
In this case, I started with a simple rotation, picked arbitrary amounts of Blue inputs to subtract from Red and Green, and tuned it:
| Red in | Green in | Blue in | Alpha in | Add in | |
|---|---|---|---|---|---|
| Red out | 0 | 0 | 1.0 | 0 | 0 |
| Green out | 1.0 | 0 | -0.217 | 0 | 0 |
| Blue out | 0 | 1.0 | -0.359 | 0 | 0 |
| Alpha out | 0 | 0 | 0 | 1 | 0 |
| Add out | 0 | 0 | 0 | 0 | 1 |
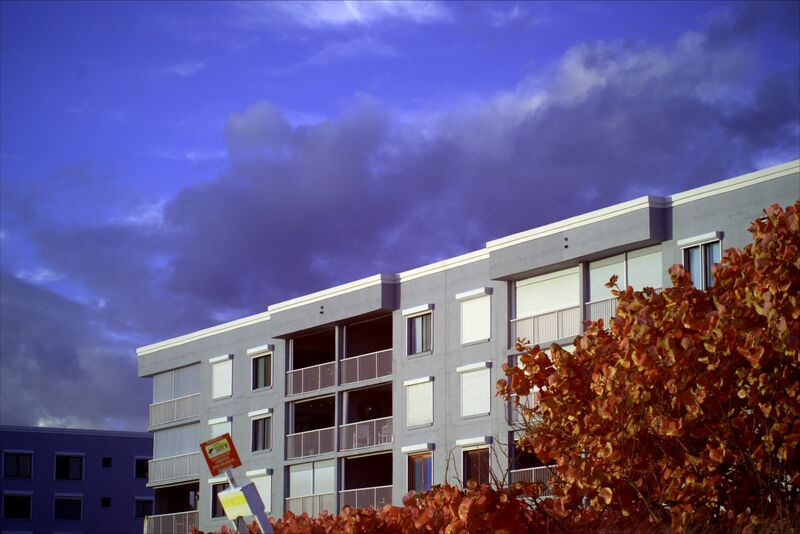
Once I made these adjustments, I cut back to the “Photo” tab. I tuned up the exposure and saturation in the RAW palette, and a few other tweaks in the Photo palette.
I could see wanting more control over the Aerochrome process though.
We Have More Controls
The single matrix approach doesn’t give you the per-channel curves adjustments that you might want to get a specific treatment.
We can fix that.
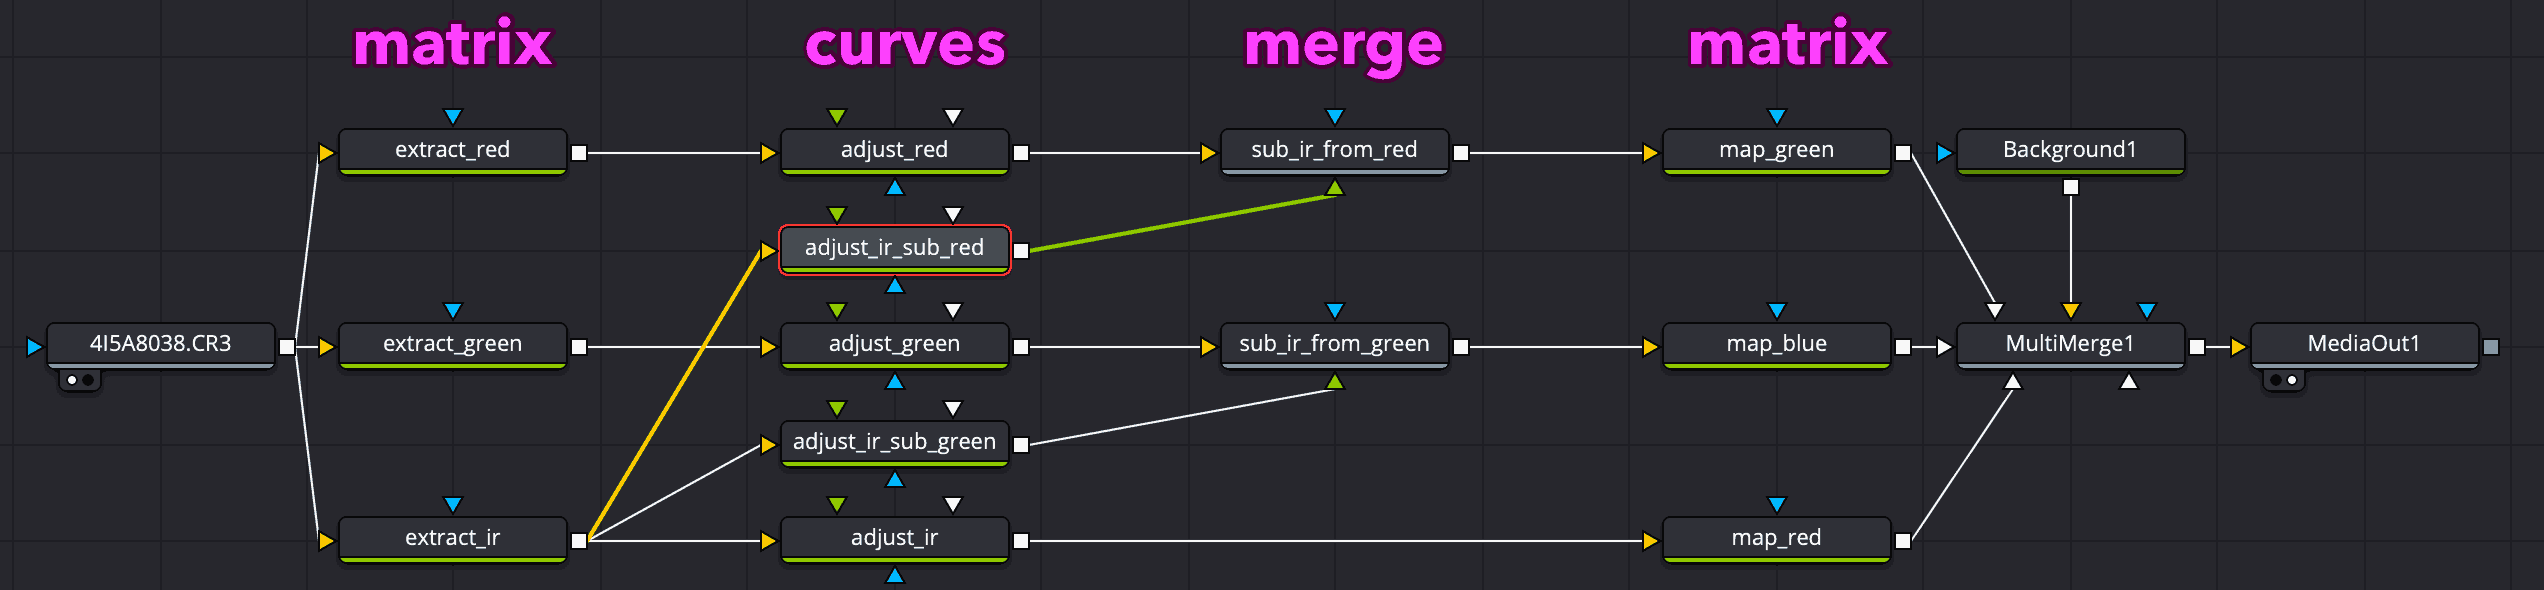
This is considerably more complicated, but I found it useful not just for my artistic goals but also to understand the signal flow from Jason’s Photoshop process.
- We start with a normal input node.
-
We have three matrices extracting
red, green, and blue channels.
As an example, the red matrix is:
Send red to all three channels Red in Green in Blue in Alpha in Add in Red out 1 0 0 0 0 Green out 1 0 0 0 0 Blue out 1 0 0 0 0 Alpha out 0 0 0 1 0 Add out 0 0 0 0 1 - After the matrices, we have curves adjustments for red, green, and three separate ones for blue. These allow us to change the blue curve prior to subtracting it from red or green.
- We have a merge each for red - blue and green - blue operation. These merges have red or green come in on the background channel, the curved blue is on the foreground channel, and the merge is set to "Darken," which does the subtraction.
-
After the two merges, we have a
separate matrix each to map the
merged red, merged green,
and blue/IR channels to their new
green, blue, and red identities.
We grab a third of each channel,
but you could also just grab a single
channel and throw the other two on the floor.
Average three channels into red Red in Green in Blue in Alpha in Add in Red out 0.3333 0.3333 0.3333 0 0 Green out 0 0 0 0 0 Blue out 0 0 0 0 0 Alpha out 0 0 0 1 0 Add out 0 0 0 0 1 - We use a MultiMerge with a black background to Screen (or Lighten) all three color channels into a single image…
- And finally, send that to the output.
Resolve Operations
I did both of these in the “Fusion” tab after importing the photos in the “Photos” tab.
Josef pointed out that you can do this in the “Color” tab too, which has nicer visualizations and specific color tools available. Additionally, it’s where the operations from the “Photo” palette in the “Photo” tab6 this is as confusing to write as it is to read btw go, so you have more control over the order of operations.
The “Color” tab tools to add and play with are:
- Splitter
- Custom Mixer
- Combiner
Elixir Nx
Elixir is a cool programming language and Nx, short for “Numeric eliXir”, is a project that lets you do fast numeric operations on tensors like matrices and vectors with the option of using CPU and GPU compilation. Josef is working through “Machine Learning in Elixir”, and many of the examples in the book use Nx, the “StbImage” image library, and the “Kino” visualization library. One of these examples inverts an image by multiplying it by a matrix:
invert_color_channels = Nx.tensor([
    [-1, 0, 0],
    [0, -1, 0],
    [0, 0, -1]
])

"Cat.jpg"
|> StbImage.read_file!()
|> StbImage.resize(256, 256)
|> StbImage.to_nx()
|> Nx.dot(invert_color_channels)
|> Nx.as_type({:u, 8})
|> Kino.Image.new()
That invert_color_channels matrix
looks pretty familiar!
After some experimenting,
we learned that StbImage
doesn’t load Canon CR3 raw files,
and that the matrix is
oriented differently than Resolve,
so each row is an input,
and each column is an output,
so our matrix ended up like this:
| Red out | Green out | Blue out | |
|---|---|---|---|
| Red in | 0 | 1 | 0 |
| Green in | 0 | 0 | 1 |
| Blue in | 1 | -0.263 | -0.417 |
In addition to the matrix,
we also pre-converted the raw to a JPEG
that StbImage could read,
and did a bit of theorycrafting
about the pixel format from a JPEG being
{:u, 8} which I assume to mean each channel’s an
unsigned 8 bit integer.
In code, this reads like:
flamin_hot_aerochrome = Nx.tensor([
  [0, 1, 0],
  [0, 0, 1],
  [1, -0.263, -0.417]
])

"4I5A6343.jpg"
|> StbImage.read_file!()
|> StbImage.to_nx()
|> Nx.dot(flamin_hot_aerochrome)
|> Nx.as_type({:u, 8})
|> Kino.Image.new()
We spent a bit of time messing around with the
bit depth of the Nx.as_type/1 call,
but got distracted and
started talking about something else.
Some interesting future work might be:
- make a library that wraps LibRaw to allow direct loading of images from a camera
- figure out the pixel format mysteries that will bring
- develop an efficient way to represent curve adjustments and adding matrices together in Nx
- making this into a web app or something
Closing Thoughts
Infrared has been a ton of fun to shoot with, whether or not I run the resulting image through the Flamin’ Hot Aerochrome process or not. It’s not something I use all the time, but nothing actually is. To me, photography as a medium is as much about capturing and sharing a specific way to see the world, and infrared, with or without this process, is certainly an unusual and interesting point of view.
I’ve uploaded some raw unprocessed images you can play with at https://i.bf1c.us/bk-flamin-hot-aerochrome.zip . Some of these are good for this process, and some of these are less good for this process. These images are provided under the Creative Commons Attribution-NonCommercial-ShareAlike 4.0 International license7 The tl;dr is play around with them, credit me if you post your edits on them, don’t sell them, and understand that your takes will have the same license. . If you make something cool, let me know :)
This technique has opened up a bunch of new possibilities for how to create art for me. I hope this post has been some kind of inspiration for you, and that you can use it to find a new vision for yourself too.
Thanks
This post absolutely wouldn’t’ve happened without Josef Diago, who very patiently showed me how to use Resolve and riffed back and forth on most of these processes. I also wouldn’t have even thought to do this without the videos from Jason “grainydays” Kummerfeldt.
Additionally, I’d like to thank my reviewers, Lily “zap!” Baker and Matthew Pancia.